
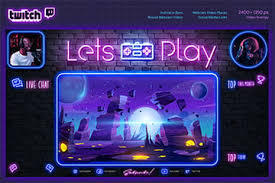
Creating a professional live stream requires more than just going live — it’s about building a complete visual and interactive experience. The top streamers on Twitch, YouTube, and Facebook Gaming all share one thing in common: presentation. From lighting and audio to overlays and branding, every detail shapes how your audience perceives you. In this detailed guide by GreatOverlays, you’ll discover how to build a truly professional stream using the right tools, smart design techniques, and engagement strategies that keep viewers coming back.
1. Understanding What Makes a Stream Professional
A professional stream is about clarity, balance, and consistency. When your visuals, audio, and branding work together seamlessly, your channel instantly looks credible and appealing.
Here’s what sets a professional setup apart:
-
High-quality equipment for lighting, audio, and visuals.
-
Clean stream design with consistent overlays and transitions.
-
Engaging audience interaction through alerts and activities.
-
Strong visual branding that reflects your personality or niche.
At GreatOverlays, you’ll find complete branding packages — from custom overlays to animated alerts — designed to bring your streaming setup to a professional level.
2. Essential Tools for a Professional Setup
The first step in creating a high-quality stream is choosing the right software and hardware.
Streaming Software:
-
OBS Studio: The most popular open-source software for advanced customization, scene transitions, and bitrate control.
-
Streamlabs Desktop: Best for integrated widgets, alerts, and dashboard analytics.
Hardware Encoding:
Use NVENC (NVIDIA) or AMD hardware encoding for smoother streams without overloading your CPU.
Capture Cards & Cameras:
If you’re using a DSLR or mirrorless camera, a capture card is essential for clean, lag-free input. Adjust your frame rate, bitrate, and output resolution for sharp, crystal visuals.
3. Lighting Setup for Studio-Quality Streams
Lighting defines how professional your visuals look. A simple but effective setup can instantly elevate your stream quality.
Three-Point Lighting Technique:
-
Key Light: Your main light source placed at a 45° angle for proper face illumination.
-
Fill Light: Softens shadows and balances brightness.
-
Back Light: Adds depth and separates you from the background.
Add LED lighting or colored backlights to create atmosphere and match your brand colors. Proper lighting enhances skin tones, improves focus, and gives your stream a cinematic touch.
4. Audio Setup: Clarity That Matches Your Visuals
Even the best visuals can’t save poor audio. A professional-sounding stream relies on a clean, warm, and balanced tone.
Recommended Audio Gear:
-
Microphone: A condenser or dynamic mic with a boom arm for stability.
-
Pop Filter: Removes plosive sounds for smoother speech.
-
Noise Gate & Compressor Filters: Reduce background noise and stabilize volume.
-
Limiter Filters: Prevent sudden peaks in loud moments.
Adjust mic levels and audio bitrate to maintain warm, consistent sound throughout your stream. GreatOverlays’ advanced setup tutorials include detailed audio optimization guides tailored for OBS Studio and Streamlabs Desktop.
5. Creating a Branded Stream Design
Visual branding is what separates a random stream from a memorable one. Every font, color, and overlay should align with your channel’s identity.
Here’s how to design your branded layout:
-
Choose brand colors that reflect your tone — bold for gaming, soft for casual streams.
-
Maintain a consistent font family across overlays and panels.
-
Use overlay packs from GreatOverlays to create a cohesive look with matching transitions, alerts, and panels.
-
Keep your stream layout minimal and clean — avoid overcrowding.
Your overlay design should balance clarity and creativity, ensuring your content remains the focus while maintaining brand consistency.
6. Scene Setup & Smooth Transitions
Professional streams are organized around well-structured scenes for a smoother viewing experience.
Recommended scene structure:
-
Intro Scene: Announces your stream with branded visuals.
-
Main Scene: Displays gameplay, webcam, chat box, and overlays.
-
BRB Scene: Keeps viewers engaged while you take a short break.
-
Ending Scene: Wraps up your session with your logo and thank-you message.
Use scene transitions and stinger transitions for seamless changes between scenes. GreatOverlays’ animated stream transitions make these shifts look cinematic and professional.
7. Engaging Your Audience Like a Pro
Visuals bring viewers in — interaction keeps them there. Audience engagement is key to growth and community building.
Pro tips for engagement:
-
Use stream alerts to recognize follows, donations, and subs in real-time.
-
Ask interactive questions and run chat polls to involve your viewers.
-
Maintain a streaming schedule — consistency builds audience trust.
-
Give name callouts and personal shoutouts to make viewers feel valued.
When paired with GreatOverlays’ animated alerts and interactive design packs, your engagement becomes dynamic and immersive, turning casual viewers into loyal fans.
8. Keeping Your Stream Fresh and Relevant
A professional channel evolves over time. Refreshing your visuals and layout keeps your stream modern and engaging.
-
Update your overlay packs and scene designs regularly.
-
Follow trending designs in the streaming community for inspiration.
-
Adjust your streaming style as your content grows.
-
Use seasonal overlays or color themes to match events or brand updates.
At GreatOverlays, you can find stream refresh bundles that let you update your visuals while keeping your original branding intact.
9. Final Thoughts
Building a professional stream isn’t just about having good gear — it’s about combining design, branding, and engagement into a seamless viewer experience. With the right setup, clean visuals, and consistent interaction, you can create a broadcast that looks, feels, and sounds like a studio production.
Whether you’re starting from scratch or upgrading your current layout, GreatOverlays offers everything you need — custom overlays, stream packages, animated alerts, and transitions — all optimized for OBS Studio and Streamlabs Desktop.
Visit GreatOverlays.com today and start building your professional stream with visuals that define your identity and keep your audience coming back.
FAQs – Building a Professional Stream
Q1: What’s the best streaming software for professional setup?
OBS Studio for customization and Streamlabs Desktop for integrated tools are both excellent choices.
Q2: How do I make my stream look more professional?
Use proper lighting, branded overlays, and scene transitions for a polished appearance. GreatOverlays provides all the resources you need.
Q3: How can I improve my audio quality?
Use filters like noise gate, compressor, and limiter, and position your mic correctly with a boom arm and pop filter.
Q4: What bitrate should I stream at?
For 1080p streaming, use 4500–6000 kbps with a hardware encoder for smooth performance.
Q5: How often should I update my stream design?
Refreshing your layout every few months keeps your visuals modern and your branding relevant. GreatOverlays offers ready-made updates for every style.
- Build a Professional Stream: Tools, Design & Engagement Secrets (by GreatOverlays)
- From lighting and audio to overlays and branding, every detail shapes how your audience perceives you. In this detailed guide by GreatOverlays, you’ll discover how to build a truly professional stream using the right tools, smart design techniques, and engagement strategies that keep viewers coming back.
- Professional Streaming , Stream Design, OBS Studio Setup, Streamlabs Desktop, Custom Stream Overlays, Stream Branding, Animated Stream Alerts , Stream Transitions , Lighting Setup for Streaming , Camera Setup Guide, Audio Setup Tips
Related posts:
No related posts.


