


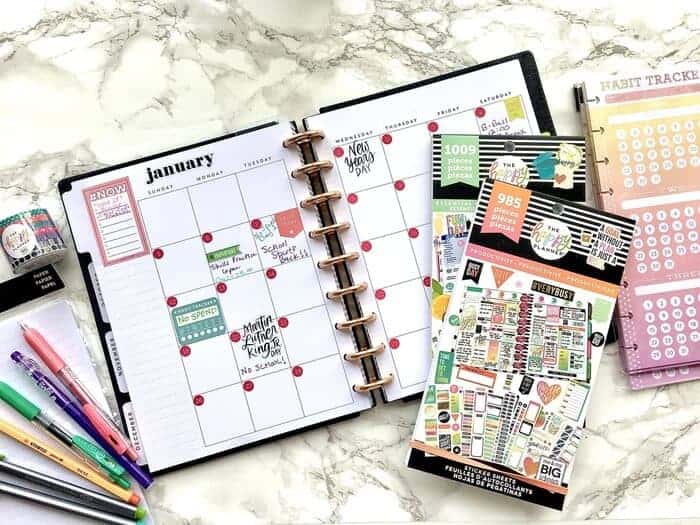
Your Happy Planner is more than just a tool for organization—it’s an extension of your personality, creativity, and lifestyle. Personalizing your planner can make planning more enjoyable, motivating, and visually appealing. Whether you are a seasoned planner enthusiast or just starting, these 10 creative ways will help you add a personal touch to your Happy Planner.
1. Use Washi Tape for Borders and Dividers
Washi tape is a must-have for planner lovers. It comes in endless colors, patterns, and textures, making it a fun way to decorate your planner. Use washi tape to:
- Create colorful borders on your pages
- Highlight important dates and events
- Make custom dividers for different sections
- Add a pop of color to your weekly spreads
Mix and match different washi tapes to give your planner a unique and vibrant look.
2. Create DIY Stickers and Labels
Stickers are an essential part of any Happy Planner. If you can’t find the perfect sticker for your needs, why not create your own?
- Use a Cricut or Silhouette machine to cut custom stickers
- Print out sticker sheets with motivational quotes
- Hand-draw and color small doodles, then turn them into stickers
- Design functional labels for appointments, reminders, and goals
Personalized stickers make planning fun and help keep your schedule organized.
3. Incorporate Photos and Memorabilia
Adding personal photos and memorabilia can turn your planner into a scrapbook of memories. Some ideas include:
- Printing mini Polaroids or photo strips of special moments
- Taping in tickets from movies, concerts, or trips
- Adding pressed flowers or leaves from nature walks
- Including handwritten notes or letters from loved ones
This technique turns your Happy Planner into a cherished keepsake.
4. Hand-Lettering and Calligraphy
Make your planner more elegant and visually appealing by incorporating hand-lettering and calligraphy. You can:
- Write out headings and days of the week in fancy script
- Create artistic banners and flourishes around important notes
- Use brush pens to add a creative touch
- Practice different fonts for variety
Even if you’re not a calligraphy expert, simple cursive writing can elevate your planner’s aesthetic.
5. Add Custom Inserts and Dashboards
Your Happy Planner should be tailored to your needs. Custom inserts and dashboards can help with specific planning needs, such as:
- Meal planning
- Habit tracking
- Budgeting
- Fitness goals
You can design these inserts yourself or download printable templates online. Laminate them for durability and reusability.
6. Use Color Coding for Better Organization
Color coding makes it easier to identify different categories in your planner. Try using different colored pens, highlighters, or sticky notes for:
- Work tasks (blue)
- Personal events (pink)
- Health & fitness (green)
- Social activities (yellow)
This system helps you quickly recognize tasks and keeps everything visually structured.
7. Incorporate Inspirational Quotes and Affirmations
Your planner isn’t just for scheduling—it can also be a source of motivation. Add inspirational quotes and affirmations to keep yourself uplifted and focused.
- Write a new quote at the start of each week
- Use decorative quote stickers
- Hand-letter a mantra that resonates with you
- Create a vision board page with affirmations and goals
Seeing positive words regularly can boost your mindset and productivity.
8. Experiment with Different Layouts
If the standard planner layout isn’t working for you, switch things up! Some creative layout ideas include:
- Bullet journaling sections
- Hourly time blocking for productivity
- Gratitude journaling spaces
- Doodle-friendly pages for sketching ideas
Customizing your layout ensures your planner suits your lifestyle and workflow.
9. Use Stamps and Embellishments
Stamps and embellishments add a fun and artistic touch to your planner pages. Try using:
- Date stamps for a vintage look
- Embossed stickers for texture
- Gold foil accents for a luxurious feel
- Die-cut shapes for extra decoration
These small additions make your planner visually interesting and unique.
10. Personalize the Cover and Discs
The outside of your planner should be just as fun as the inside! Personalize the cover and discs by:
- Adding a monogram or nameplate
- Designing a custom cover with your favorite theme
- Swapping out the discs for colorful or metallic ones
- Decorating with vinyl stickers or decals
Customizing the exterior makes your Happy Planner feel even more special and personal.
Final Thoughts
Your Happy Planner is a reflection of you, so don’t be afraid to get creative and make it your own. Whether you love vibrant colors, elegant calligraphy, or functional layouts, there are endless ways to personalize your planner. By incorporating these 10 ideas, you can transform your planner into a beautiful, inspiring, and practical tool that brings joy to your daily routine.
Start personalizing today and make your planner a true expression of your creativity!


